Showing posts with label dinner. Show all posts

Wednesday, June 26, 2024

Crockpot Meatball Vegetable Soup

This was another recipe my family really enjoyed recently. I made it straight into the crockpot this time, since we had a happy baby window but not enough time to start prepping multiple meals for the freezer. Everything I have made ahead and frozen from The Family Freezer has turned out great. We had enough leftovers that it made sense to use our Souper Cubes to freeze a few portions, so we ate this twice in one week and had a couple cubes put up for later. Win! 
If you are making this non-dairy (like I did), be sure to check the meatballs carefully. There are many good options, but you have to check the labels. This would also be good vegetarian - use vegetable broth and meatless balls. ;) 

Crockpot Meatball Vegetable Soup

From: The Family Freezer
Yields: 6 servings

Ingredients

15oz can cannellini beans, drained and rinsed
16oz bag of frozen peas and carrots
assorted other frozen vegetables if desired - I added some frozen spinach and green beans I wanted to use up
24oz jar marinara sauce
1 pound frozen meatballs
4 cups chicken broth (not needed until day of cooking)

To Freeze and Cook Later

1. Label your freezer bag.
2. Add all ingredients to your freezer bag (except chicken broth).
3. Seal and freeze for up to three months.

To Cook

1. Thaw overnight in fridge or in morning in water.
2. Add to crockpot with broth.
3. Cook on low setting for 4 hours in a 6-quart crockpot or 8 hours in a 4-quart crockpot.

Turkey Zucchini Alfredo Pasta

 I'm always looking for new ways to make non-dairy versions of classics. Today's research lead me to a vegan alfredo recipe. Some of the directions were a little suspect for how I know these ingredients to behave, so this is my take on it. I'm pairing my version with some ingredients that were bouncing around my brain (and my vegetable drawer.) 


Turkey Zucchini Alfredo Pasta

Ingredients: 

For the sauce

  • 1 tbsp flour
  • 1 tbsp plant based butter
  • 1-2 cups chicken broth 
  • 1/2 can coconut milk or cream
  • 1 tbsp nutritional yeast (optional - makes it a little cheesy without the dairy or non cheese melting issues)
  • 1 tsp liquid smoke (optional - gives the cheesiness a hint of smoked gouda) 
For the rest
  • pasta (I used rigatoni) - about half the box, scale as needed
  • drizzle of olive oil
  • 1 shallot, thinly sliced 
  • 1-4 cloves of garlic, crushed and minced
  • 1 pound ground turkey
  • dried or fresh thyme, to taste
  • 2 zucchini, grated 
  • salt to taste

Directions:

If you're really doing good, you can do all three of these at the same time and get them on the table faster. 

  1. In a pot, boil water and cook pasta according to package directions. 
  2. In a pan, make a roux using the flour or tapioca starch and the plant-based butter. Use coconut cream or milk and water or chicken broth to get a runnier pasta sauce consistency. Mix in the milk and broth alternatingly a little at a time so that it has a chance to smooth out and you can stop before it is too runny. When basically done, add nutritional yeast and liquid smoke and stir well. 
  3. In another larger pan, heat a drizzle of olive oil. Add onions and garlic and cook on medium or medium low for a few minutes. Add the ground turkey and cook, breaking it up as you go.  Add thyme. Add zucchini. 
  4. Finally, drain pasta and combine all three pans into one large serving bowl. You may want to spoon the turkey mix out of it's pan if the zucchini sweated and there is a lot of liquid in the pan. Toss to combine and serve! 


Monday, June 3, 2024

Crockpot Chicken Fajitas

 With a new baby at home, I am currently all about the crockpot meals. Lots are make ahead and freeze friendly. As I try them I want to share what worked well and what I plan to improve on next time. With any luck I'll remember to come back and share how those modifications went. ;) 

If you are new to freezer meals or batch prepping them I highly recommend the blog that this recipe came from, The Family Freezer. I learned so much from their site and they have some really great PDFs with lots of meals already grouped with shopping lists included. I will not step on their toes by trying to mimic - this is purely so I can remember what I liked to use it again. 


Crockpot Chicken Fajitas

from: The Family Freezer

  • 1 pound of chicken breast
  • 16oz bag of frozen fajita veggies (bell pepper and onions usually, I could only find ~14oz bags)
  • fajita seasoning packet (I used this recipe and only did a tbsp - I will increase the amount next time)
Combine all ingredients either directly in your crockpot or in a freezer bag to store for later. Cook on low for 4-7 hours (4 is plenty, but I was cooking from frozen and started it when I had a calm and happy baby so it spent longer in the crockpot. 😂) 
If freezing: label the bag with what it is, how long to cook it, and what day you store it. Use it within three months for best results (not freezer-burned!)

I served this with tortillas, sour cream, and a side of beans. 
Next time I will double the seasoning and the veggies. We usually hold back on "whole packet of seasoning" directions but it really would have been more appropriate at this scale. Oops! 


Monday, May 30, 2022

Chicken Lettuce Wraps - made migraine friendly!

Now that I'm testing histamine, I'm remembering some ground meat recipes I used to love. This one will not taste like a restaurant appetizer, since we don't have all of the prepared umami-filled sauces. But the crunch is there, and it has a satisfying amount of protein. 

Be aware that the water chestnuts have salicylates, so if you haven't cleared that chemical yet on your Good Days testing journey, or if you know you are sensitive to it, consider subbing in bamboo shoots. Just be sure you are checking that your can doesn't have anything added either way. 

Additionally, you can grind your meat at home if you are not testing histamines yet or are sensitive to them. We've used the food processor here since we don't even currently have access to our full kitchen arsenal. 


Migraine friendly Chicken Lettuce Wraps 

Inspired by and adapted from Damndelicious 

Ingredients: 

    1 tablespoon coconut oil
    1 pound ground chicken
    2 shallots, diced
    1 tablespoon freshly grated ginger
    1 (8-ounce) can of whole water chestnuts, drained and diced**
    2 tablespoons chives, thinly sliced
    Kosher salt and freshly ground black pepper, to taste
    1 head butter lettuce

Directions: 

1) Heat coconut oil and add ground chicken. Cook until browned through,  stirring to break up meat as it cooks. 
2) Add the chopped shallots and grated ginger and cook for a few minutes until the shallots are translucent. 
3) Stir in water chestnuts and chives, cooking a few more minutes until tender. Season with salt and pepper to taste. 
4) Serve with a small mound of the mixture in the middle of lettuce leaves, taco style. How much mix you add will vary depending on leaf size, but you want to be able to pick it up comfortably. 

Monday, May 9, 2022

Baked Salmon with Butternut Squash and Kale - made migraine friendly!

 As with my last post, it has been a few years! Again, lots of life changes, including another move. But most significantly for my food blogger ways is that I have embarked on a journey using the Good Days Program to find my migraine food triggers and eliminate them from my life! If you are also a migraine sufferer or have one in your life, I strongly recommend checking out the program. Their partnership with Migraine Buddy has been life-altering for me. I have been on this journey for about two months now and safely reintroduced two food chemicals that I have deemed low-risk for me personally. 

Good Days has a youtube channel that shares great recipes from the completely safe for everyone "Isa's shopping list" (included in their plan). As I am adding new safe foods to my personal shopping list, however, I am finding I need to get a little creative with adapting other recipes and I realized I wanted to come back here to have a record of the recipes that were successes. Hopefully, it will help someone out there too. ❤️

Full disclosure - I am NOT being sponsored by Good Days or Migraine Buddy! These opinions are purely my own based on the fabulous success I am having so far. They do caution that not everyone has food as a sensitivity for them, so it is possible to do the diet changes and not have results. If that is the case, you just go back to eating whatever. But many migraine sufferers have 4-5 food chemical sensitivities, and the list they have developed is based on a LOT of scientific studies and articles, and I love me some solid data. 


(If you are working the elimination diet yourself or already know your trigger chemicals, please see notes at the end regarding optional alterations.) 

So, without further babbling/proselytizing... 


Baked Salmon with Butternut Squash and Kale - made migraine friendly! 

Inspired by CookingLight and Back to the Book Nutrition, heavily modified


Ingredients

2 1/2 cups chopped butternut squash 

2-3 large sliced shallots 

1/4 cup melted ghee or coconut oil (spray is very convenient here) 

salt and black pepper

1 tablespoon ghee, coconut oil, or olive oil (in a pinch, though some people react to it) 

2 (6-oz.) skin-on salmon fillets 

2 teaspoons pure maple syrup 

3-4 cups torn curly kale 

Linseed oil for finishing, if desired


Directions 

1. Whisk melted ghee with a sprinkling of salt and pepper and an herb if desired (see food chemical notes at the end). Toss butternut squash and shallots with this and spread in a flat layer on a baking sheet. Roast at 400°F for 20 minutes or until tender. 

2. Heat 1 tablespoon of ghee, coconut oil, or olive oil in a nonstick skillet. Brush the salmon with maple syrup and sprinkle with a little salt and pepper. Cook the salmon skin side down 3-4 minutes. Flip, and cook for an additional 2-3 minutes, adding the kale to the pan to wilt.  

3. Toss the butternut, shallots, and kale together, adding a drizzle of linseed oil if desired. Top with salmon.    


Food chemicals to note: 

Unless your fish is EXTREMELY FRESH, like caught, gutted, and frozen within 30 minutes on the boat FRESH (which I can never find indicated anywhere...) then it has histamine. As this is the third chemical I am testing, this works out great for me. If you are not there yet or have a sensitivity to histamine as a migraine risk factor, consider cooking up some fresh chicken breast instead. 

Spices: If you have cleared the first chemical and are not actively testing a new one, then feel free to include rosemary and/or sage in the roasting your butternut step.  Friendly full time: basil, ginger, chives, or parsley. I recommend picking just one here. 


Tuesday, March 29, 2016

Butternut Squash Mac and Cheese with Caramelized Onions and Bacon


This mac and cheese recipe is So Much Better than anything you can find in a box. It takes about the same amount of time, if you rush the onions. Better than quick, you know what all of the stuff is in this macaroni, no preservatives or artificial junk. You can use just about any cheese you've got - I used extra sharp cheddar and gruyere, and any squash you've got - acorn, butternut, even something like pumpkin works. If you've got leftover fresh mashed squash from another recipe use that, otherwise canned is great and quick.


Butternut Squash Mac and Cheese with Caramelized Onions and Bacon
inspired by abby langer nutrition and pinch of yum


Ingredients

1 pound elbow macaroni or rotini
1/4 cup and 1 tbsp butter
2.5 tablespoons flour (I use King Arthur white whole wheat)
2 cups milk
4 cups grated cheese
1 cup mashed butternut squash
2 small onions, thinly sliced
3 slices of bacon, cooked crisp


Directions

1. Melt 1 tbsp butter in a cast iron skillet over medium heat. Add the onions, turn heat down, and cook for at least 30 minutes or until caramelized, tender, and brown.

2. Cook pasta according to package directions.

3. Melt remaining butter in a sauce pan. Add flour and whisk until well combined. Add milk, whisking as you go. Let simmer until slightly thickened. Remove from heat and add squash and cheese. (You can add it back to the heat briefly if it isn't melting, but it is more likely to get grainy if you keep it on the heat here.)

4. Drain pasta, return the the pot. Pour cheese sauce over the pasta, stir to combine. Add onions, stir to combine. Serve hot with bacon crumbled over top.


That's it! Easy peasy. Oh, this would be good with peas too... ;)

I know this one is more of a fall food... but man am I craving some right now. What is your favorite comfort food, fall or spring?


Saturday, March 26, 2016

Potato-Horseradish Gratin with Caramelized Onions

I first made this recipe on February 25, 2012. I know this because the menu for that dinner party is still the bookmark on page 862 of Southern Living's 1001 Ways to Cook Southern, a gift I received from my now mother in law when Brian and I moved to North Carolina from Massachusetts the summer of 2011. That February dinner party night I served a Rosemary-Thyme Rib Roast. Potato gratin has since made its way to my Easter table. Last year there wasn't time for this more involved version of the dish, and I went a more classic route. This year I am trying it as a make ahead dish - I'll let you know how that works out when I edit to add pictures in a couple days!

Potato-Horseradish Gratin with Caramelized Onions

from Southern Living's 1001 Ways to Cook Southern
makes 8 servings   ||   prep: 1 hr, 25 min. cook: 1 hr., 10 min. stand: 10 min.

Ingredients:

2 1/2 lb medium-size baking potatoes
1 tsp salt, divided
2 cups half-and-half
1/2 cup cream-style horseradish
1/4 cup butter
2 large onions, thinly sliced
1 tsp sugar
1 tbsp balsamic vinegar
1 cup (4 oz) shredded swiss cheese
1/4 cup chopped fresh parsley, divided

Directions:

1. Preheat oven to 400°F. Cook potatoes in boiling water to cover 20 minutes or until almost tender. Drain and cool slightly. Peel potatoes, and cut into 1/4-inch-thick slices. Arrange potato slices in a lightly greased 13-x 9-inch baking dish. Sprinkle with 1/2 tsp salt and 1/2 tsp pepper. 
2. Stir together half-and-half and horseradish, and pour over potato.
3. Bake, covered, at 400°F for 40 minutes. 
4. Melt butter in a large skillet over medium heat. Add onion, remaining 1/2 tsp salt, and remaining 1/2 tsp pepper; cook, stirring occasionally, 20 minutes. Add sugar and cook, stirring occasionally, 5-8 minutes or until onion is caramel colored. 
5. Stir in vinegar, and cook 2 minutes or until liquid evaporates. Remove from heat, and cool 5 minutes. Fold in cheese and 2 tbsp of parsley. 
6. Uncover potato; top with onion mixture. Reduce temperature to 350°F. 
7. Bake at 350°F for 30 minutes. Let stand 5 minutes; sprinkle with remaining 2 tbsp parsley. 


Make ahead option: 
This can be prepared through step 5 up to 24 hours before. Remove potatoes from oven, let cool. Keep covered and refrigerate. Cover onion mix and refrigerate. 
When ready to cook, remove from fridge and allow to come back towards room temperature 30-60 minutes. Top potato with onion mixture and cook uncovered at 350°F for 30-40 minutes or until heated through. Finish with parsley as normal. 

What is your favorite make-ahead holiday meal? Favorite holiday potato? 

Sunday, March 22, 2015

Seafood Pot Pie

I came across this recipe card cleaning out the bookshelf recently. I have a problem with ever getting rid of a single recipe card, cooking magazine, cookbook, etc... It's really just best if it doesn't make it in the house if it isn't a winner. Recently I've been on a rampage against all things "Cream of _____ Soup". Its been so frustrating how many slow cooker meals expect a hunk of meat and can of cream of ___ soup. I find it really unappetizing. Anyone else? *Looks around for hand raises*

Cream of ____ soup is a really simple thing to eliminate. Yes, it is fast, but I promise you have the replacement ingredients in your kitchen right now. It really only takes three. Ready? Butter, flour, and milk. That's it! Of course you can get fancy... I usually add in some chicken stock (or broth, or even from bouillon cubes...) and garlic or herbs, but it depends on what you are making with it. This process starts with making a roux.


Don't worry, it's easy and tastes better than that little google provided intro makes it sound. Plus, it comes together almost as fast as opening a can of soup.

Basic Sauce

Ingredients:

  • Butter
  • Flour
  • Chicken Stock
  • Milk

Directions:

  1. Melt butter in a saucepan. 
  2. Add flour, stir until smooth paste forms. 
  3. Add milk, stir until it starts to thicken. 
  4. Add stock, stir until it starts to thicken.
  5. Alternate adding milk and stock to get the flavor you're looking for. Season at the end. 


Make sure you start with enough of the roux (flour + butter) in the beginning. Adding flour later to thicken it tends to make the sauce lumpy. For a pot pie you'll need about half a stick of butter (4 tablespoons) and 1/4 cup flour. Pasta for two you can go with about half that. Remember you can mix in seasonings to match the meal. Here are some options to consider:
  • salt and pepper
  • garlic (minced, powder, or salt)
  • dried oregano
  • dried basil
  • shredded cheese (parmesan for white pasta sauce, cheddar/swiss/gouda/etc for mac and cheese)


So now that you have the basic... see how I apply it in my remake of this recipe card from who knows what grocery store picked up in 2006 if the printing date is to be trusted.


Seafood Pot Pie
adapted by joyfulfoodie

Ingredients:
1 cup broccoli, cut into bite size pieces
1 cup carrots, peeled and cut into 1/4-1/2 in slices
1 cup peas
1/2 cup mushrooms, sliced
4 tablespoons of butter
1/4 cup flour
1 cup milk (more or less as needed)
1 cup stock (seafood stock ideal, but chicken or vegetable works fine too) (more or less as needed)
3/4 teaspoon dried dill
2 cups cooked seafood, such as soft-shell crab, shrimp, salmon, and/or halibut.
1 cup shredded swiss cheese (4oz)
1/2 (15oz) package refrigerated pie crust (1 crust) OR 1 sheet of puff pastry (from package of two), thawed while you work on other steps.

Directions
1) Preheat oven to 400°F.
2) Prepare vegetables.
3) Melt butter in a saucepan. Add flour and stir to form a paste. When smooth, add approximately 1/4 cup milk and stir until smooth and starting to thicken. Then add approximately 1/4 cup chicken stock and stir until smooth and starting to thicken. Alternate milk and stock until it is a smooth sauce, but not too liquidy. If it seems like you went a little too far, let it simmer for a few minutes to thicken up. As a last resort, mix in a little more flour. (This won't be too terrible a fix in a pot pie, it would be more noticeable over pasta. :))
4) Add dill, vegetables, and seafood. Bring to a boil, stirring occasionally. Cook for about 3-5 minutes, to heat seafood and vegetables through. *** Stir in cheese to melt, remove saucepan from heat.
5) Pour mixture into a casserole dish. Unfold pie crust OR puff pastry and lay it over the seafood mixture. For puff pastry I usually have to get a little creative with the arranging if its in my bigger rectangle casserole dish.  Trim any edges that hang over so they are inside the dish again. If using pie crust, cut slits to vent.
6) Bake. Piecrust = 30 minutes, Puff pastry = 40-50 minutes. You want the crust (either kind) to be golden brown.

Serves 6.


***Alternate option at step 4: In a second pan, heat a drizzle of olive oil. Saute mushrooms 3-5 minutes. Add carrots and broccoli, cook 2 minutes longer. Then add all with peas and seafood to the sauce. This will make the vegetables a little more tender and add a little depth of flavor. If you're in a hurry, its fine to skip this step, but I rarely do. :)


In my mind, this combines some of the best things ever. 1) Easy = yay. 2) Pot pie = comfort food = double yay. 3) Seafood = greater than chicken = triple yay.
Your turn! What's the big recipe swap you're into these days? Anyone with me on the cream of _bleh_ rant?

Thursday, June 26, 2014

Pork with Rice Noodles, Scallions, and Chile

This is a new hit in our house. It uses favorite ingredients in new ways, to give some delicious variety to our weeknight. It comes together in about 30-40 minutes, depending on your skill level at multi-tasking.
Joyfulfoodie.com Pork with rice noodles, scallions, and chile

Pork with Rice Noodles, Scallions, and Chile

from fine cooking
total time 30 minutes || serves 4


Ingredients:

8 oz. wide rice (pad thai) noodles
1/4 cup fresh lime juice (from 2 medium limes)
3 Tbs. fish sauce
1-1/2 tsp. granulated sugar
2 Tbs. vegetable oil
1 lb. ground pork
Kosher salt
1 large red onion, halved lengthwise and thinly sliced (about 2-1/2 cups)
Joyfulfoodie.com Pork with rice noodles, scallions, and chile1 bunch scallions (both white and green parts), trimmed and cut into 2-inch lengths (about 1 cup)
1/2 to 1 small fresh green chile, such as Thai or serrano, thinly sliced**
1/2 cup chopped fresh cilantro
1/2 cup chopped fresh mint
2 Tbs. chopped peanuts


Directions: 

Boil water in a large pot. Cook your pad thai noodles to al dente following package directions (4-6 minutes typically). Drain and shock with cold water to stop the cooking. 

While that's going, mix lime juice, fish sauce, and sugar in a small bowl. Stir until the sugar disolves. 

Heat half of the oil (1tbsp) in a wok or large (12-inch) skillet over medium high heat. Really heat it... shimmering hot. Crumble the pork in and cook like you're making ground beef tacos. That is to say, making sure it doesn't form one huge block, breaking it up into small pieces. Cook until starting to brown and no longer pink. Season with salt if you want. Put it in a bowl to rest while you do the onions. 
Heat the other half of the oil (1tbsp). Same wok or skillet is perfect. Add the onion, scallions, and chile. (WEAR GLOVES TO HANDLE THE CHILI. If you have sensitive skin, like aparently I do.)  Cook until onions and scallions are softened, stirring regularly, 4-5 minutes. If you can tell if the pepper is getting soft, you cut it too big or used too much, and ohh boy are you in for a shock.

Put the pork back in, toss well to mix. Add the noodles back in, toss gently to mix... you don't want to shred the noodles. Remove from heat, add lime mix, herbs, and toss yet again. Garnish with peanuts and dig in while its still hot!


Joyfulfoodie.com Pork with rice noodles, scallions, and chile
**This dish is pretty mild with half a serrano pepper. If you're looking for spicy, kick in the whole pepper, consider half a second one. Remember, all peppers have different Scoville scale ratings, even on a single plant. If you're spice shy, err on the side of caution so you can taste all of the other wonderful flavors here! We used 2/3 of a pepper and felt it could have used just a little more. 

Related post: Hot Fingers!! How to get your hands to stop burning if you forgot the gloves when cutting up your peppers. 

Your turn! What's your favorite food with just a little bite to it? 


Sunday, March 2, 2014

Chicken Enchilada Pasta

As some of you know, I grew up in Arizona. This means most of my favorite comfort food dishes are things like quesadillas and tacos. Brian has been known to surprise me with tacos when he knows I'm not feeling good. My list of to-learn dishes is half classic French stuff a la Julia Child and half native hispanic and native american dishes like sopapillas and "Indian Fry Bread"/Navajo tacos.

All that said, I'm not a huge fan of super spicy dishes. I like to be able to - you know - taste my food.

Those factors combined, it should come as no surprise to you dear reader that I LOVE this recipe. It is super easy to control how much spice you get, it combines all my favorite things (cheese, pasta, mexican food flavors), and it makes tons of leftovers that re-heat really really well.

Once I put this one on the menu, I crave it all week.

Seriously.
Chicken Enchilada Pasta; creamy delicious pasta dish, makes fantastic leftovers. My comfort food these days, so easy! #weeknightdinner


Chicken Enchilada Pasta

from Navy wife cook

Ingredients:

rotisseri chicken
2 tbsp olive oil
2 garlic cloves
1 medium onion
1 red pepper
1 can diced green chiles (4oz)
1/2 tsp salt
2 tsp chili powder (I only use one...)
1 tsp ground cumin
2 cans green chili enchilada sauce (10 oz each) (I only use one....)
2/3 cup red enchilada sauce
2 cups shredded cheese (any kind - we tend towards cheddar)
1 cup sour cream
penne pasta (we used a 1 lb box)

Toppings: (pick what you like)
avocado
tomato 
green onions
black olives
sour cream

Chicken Enchilada Pasta from joyfulfoodie.com Directions:

Shred your chicken. Boil pasta. Chop veggies.

Heat the olive oil over medium heat. Cook the onions until soft, about 3-5 minutes. Add the red pepper and garlic and cook for another 3 minutes. 

Add everything except the cheese, pasta, and sour cream (and toppings, duh, those go on top). So that's the green chiles, salt, chili powder, ground cumin, green enchilada sauce, and red enchilada sauce. Simmer for 8-10 minutes.


Add cheese and stir until melted. Now turn the heat down to low and add sour cream, but don't let it boil. If it boils, it may curdle the sour cream (everyone says, and I say ew, so I've been careful here.) Stir until sour cream is heated and well mixed in. 

Drain pasta. Combine sauce and pasta, stir well to combine. Serve with toppings of your choice. Sit back and bask in the adoration. 

Your turn!
What is your go-to comfort food?

Thursday, February 27, 2014

Pan seared "smoked" sweet salmon


Pan seared "smoked" sweet salmon; great with sauteed bok choy and broccoli, easy weeknight dinner!

This is an easy weeknight fish dish. Try it next time salmon is on sale!

Pan Seared "Smoked" Sweet Salmon
a joyful foodie original

Ingredients:
Salmon filets
smoked brown sugar (can substitute regular brown sugar if you must, but SO GOOD with the smoked one*)
salt
pepper
olive oil

Directions:
Heat the olive oil in a pan over medium hight heat. Season the fish (scale side down) with brown sugar (at least a tsp, more depending on your fish, up to about a tbsp should be fine).

Place salmon in the pan skin side down and season with salt and pepper. Reduce heat to medium low.

Either;
a) cover with a lid and cook for 7-10 minutes depending on the size of the fish, watching for a pale pink cooked color or
b) cook for 4-5 minutes until you see color creeping up the sides and then flip it to cook on the other side for 4-5 minutes.

Pan seared "smoked" sweet salmon

My salmon was thick, so I flipped it.

Transfer to a plate and serve immediately with lots of yummy sides. I recommend cucumber and mango salad, sauteed bok choy and broccoli, and rice.


Pan seared "smoked" sweet salmon; great with sauteed bok choy and broccoli, easy weeknight dinner!


This sugar is also available at Amazon, but its cheaper at Sur la Table, especially if you order enough to get free shipping (orders of $59 or more). And no, Sur la Table is not paying me to say any of this, I just love them. They have such great customer service. :)
If you don't have smoked brown sugar, you could substitute another smoked seasoning, I suspect. Maybe smoked salt, smoked pepper, or even applewood smoked salt? Actually they have a ton of smoked salts, click around a little. :)

Your turn!
So dish! What's your favorite fish recipe? I'm looking for more recipes right now, since Lent starts next week. I just love doing fish Fridays!


Friday, November 29, 2013

Beef stew with root vegetables and horseradish

Fall always means stew season to me. Its one of those miracle dishes that once you know the fundamentals you can tweak it a million different ways to keep it interesting. The last time I tried to blog about stew, I failed miserably and charred the beef beyond all recognition. After hacking off the black bits and continuing anyways, Brian was kind, and said it imbued a subtle smokiness to the dish. (Do we see why I love this man? Not yet an "oh bleep no, we're ordering pizza" night. ♥)

This time was immensely more successful. For one, I have much better equipment now, thanks to the generosity of our friends and family at our wedding (and preceding shower). This particular recipe was blessed by the Le Creuset dutch oven from Aunt Joann. It really is so much easier to nail with a solid cast iron dish balancing out the heat. XD

Additionally, I used a very elegantly compiled "how-to" from Fine Cooking magazine. I could wax poetical about them all day though, so I won't get started (except to say that I love the subscription Brian got me for Christmas last year, and pour through every glossy page like its a religious experience.)

But we were talking about stew.

This beef stew combines all the right classic elements, with just a little edge of surprise. I am loving having the leftovers for lunch. It is definitely NOT a weeknight meal. This is a make on the weekend, start after lunch, fill the house with good smells, drool in anticipation sort of meal.

Beef Stew with root vegetables and horseradish; fantastic fall or cold winter weather recipe.


Beef stew with root vegetables and horseradish
from fine cooking

Saturday, June 15, 2013

Balsamic Saturday

Balsamic vinegar. Is there a better condiment? I mean I guess it depends on what you're working on, but its so versatile. Come on, can you put ketchup on ice cream?

Tonight we are cleaning out the veggie drawer so we can start fresh at the farmer's market. (One of my favorite things about summer!) Brian is grilling portabello mushroom caps on the grill, and I am making a roasted balsamic carrot side. YUM. Usually I don't heat up the kitchen like that in the summer months, but our central AC is pumpin fine and sometimes you just have a hankerin for tender sweet warm carrots.


Portobello "Burgers"

Wednesday, January 30, 2013

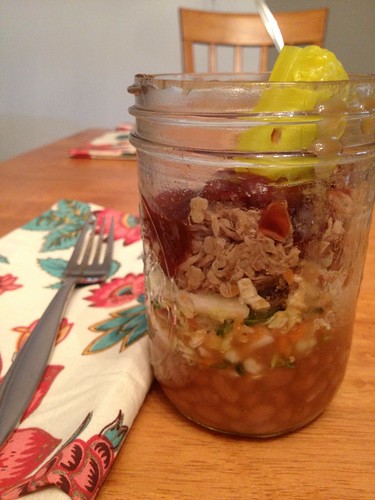
Superbowl Sundaes ;)

IMG_1467

This has been one of my go-to dishes this fall. Easy, quick cleanup, ready when you get home from work. Its pretty healthy, as far as game day foods go, and if your crowd doesn't finish up the food, it freezes super well.

Barbecue Sundae
from Southern Living comfort food
You can take shortcuts by getting ingredients at a meat-and-three or favorite barbcue, but the pork is so easy in the slow cooker, why would you want to?? :)

Ingredients:
2 cups warm baked beans
2 cups coleslaw
1 pound warm shredded barbecued pork
Barbecue sauce*
Dill pickle wedges (optional)

Directions:
Divide baked beans among 4 small bowls, mugs, or wide-mouth jars; top each portion with 1/2 cup slaw, 1/4 pound shredded barbecue pork, and sauce. Serve with a dill pickle wedge, if desired.

Yields 4 servings, so double and triple away for a game day crowd.

*This family swears by Sweet Baby Rays. WWP+ is about 2pts per serving on that, which is plenty in a sundae.


Slow-Cooker Carnitas (or one rockin' pork starter) (5 WWP+ for 4oz serving)
from thekitchn
Ingredients:
1 (6-8 pound) pork butt, also called pork shoulder
2 tablespoons coarse salt
1 tbsp cumin
1 tbsp freshly ground black pepper
1 tbsp dried oregano
2 tsp ground cinnamon
1 tsp cayenne pepper, or to taste
8 whole garlic cloves, smashed
4 chipotle peppers (canned or dried)
1 cup tomato juice
1 cup orange juice

Directions:
Trim excess fat from the meat and discard. Put all of the ingredients in the slow cooker. Set to cook on low for 8 hours. You can tell the meat is done when the house smells so good you can stand it any longer, and the meat falls off the bone. Shred the meat into a serving bowl.

Bonus tip, you can skim the fat off the juice and keep some to reheat the meat in. Great for storing leftovers in the freezer! I've had it keep as long as 3 months so far, but I can't resist it any longer than that, even for testing purposes. ;)
Yields about 26 servings


And my favorite slaw recipe? I'm so glad you asked.

Zesty Slaw (0 WWP+)
from the Food Network
4 tbsp rice wine vinegar
2 tbsp fresh lime juice
1 tbsp canola oil
1 tbsp sugar
1 head napa cabbage**, shredded
1/4 cup fresh cilantro leaves
4 tbsp freshly sliced green onions
1 carrot peeled and shredded
salt and freshly ground black pepper
Directions:
Whisk the rice wine vinegar, lime juice, canola oil, and sugar together in a small bowl.
Add the cabbage, cilantro, green onions, and carrot to a large serving bowl and combine. Drizzle with the dressing and toss to coat. Season with salt and pepper, to taste, and serve.

**Use judgement on the cabbage. If it looks like waaaaaaaaaay more than you need, half the recipe and stop chopping! It does keep for a couple of days though. :)


Not a fan of barbecue sauce? (I'm shocked you stayed this long!) Combine the pork and the slaw on a flour tortilla for a kickin' carnita instead!


What's your favorite Game Day recipe? And what's that one splurge item you can never resist?


EDIT: 2/10/13
I'm trying out something new, to give you guys some more options for saving favorite recipes. My go to method is to print full page and add to a binder, but I know a lot of people prefer recipe cards. Let me know if this method of printing works for you at all! :)

Sunday, August 14, 2011

New Grill -- Shrimp and Pineapple Kebabs

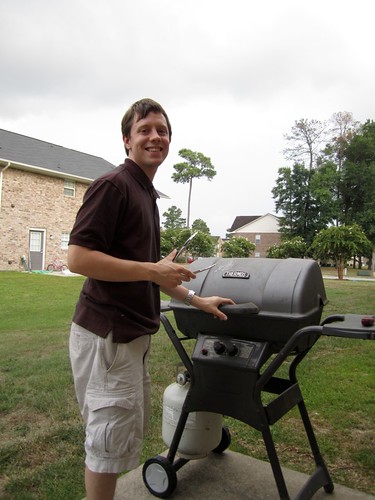
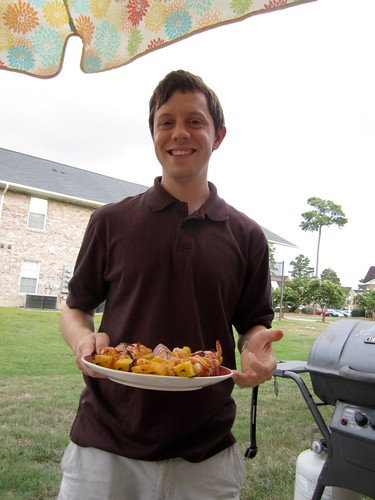
There is nothing like grilling in the summer. We've been fortunate in Boston to have either my landlord's grill or my roommate's grill, so we've never had one of our own. Luckily there were never any "ugh, they left the gas on AGAIN?!" moments or surprises. Once we got here it seemed important to find a grill as quickly as possible. It happened pretty quickly... we found one today! Best part? It was free!! Thanks be to craigslist. A very kind gentleman posted a grill his friend had left behind, and was asking $20. The starter is broken, it has some slight cosmetic rust, but it works! And he didn't want a dime. Said he didn't want scrap metal seekers bothering him. Bonus; he took one look at Brian's compact car and threw it in his mini van.

IMG_4300

To celebrate, we've had two of three meals hot off the grill today. :D Basic hotdogs for lunch, and never fails to make me swoon shrimp and pineapple kebabs for dinner. Wouldn't you know this is another recipe I can't recall where I first saw it? I know I read it the first time... I've just made it from memory - or as close as I can get - every time since then.

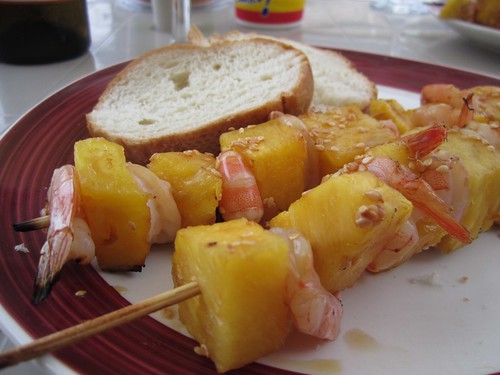
Shrimp and Pineapple Kebabs
from ???

40 raw shrimp, peeled and deveined (tails on)
1 pineapple (you'll use about 3/4 of it)
1 red onion
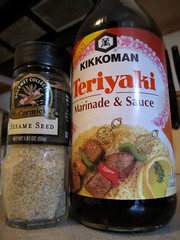
1/4 cup teriyaki sauce
1 tbsp sesame seeds

Cut up the pineapple; start by cutting off the top leafy part. Then cut down the sides to shave off the outside spiny bits. Then cut off the bottom outside bit. If you look at the middle, there is a core - this part is woody and not good for nomming on. Cut off sections of the pineapple leaving that part behind, just like you would an apple. If you cut too far into it, you'll know, just trim it off. Cut those pineapple portions down into rough cubes, about 1 inch chunks. The idea is that the pineapple will char before the shrimp, and help protect it from overcooking and drying out, so don't get them too small. Plus, they split when skewered if they're too small.
Of course you can skip all that if you are substituting canned pineapple cubes. ;)

Cut the red onion into quarters or eighths (depending on number of skewers planned, and how cooked you want the onion). My pictures show eighths.

Toast the sesame seeds for a couple of minutes. Do not burn them! I find 4 minutes at 350*F is usually enough, it may finish faster in a toaster oven (I don't remember toaster times, and don't have a new toaster yet to try it).
IMG_4265

Mix the sesame seeds with the teriyaki sauce.
IMG_4272 IMG_4282

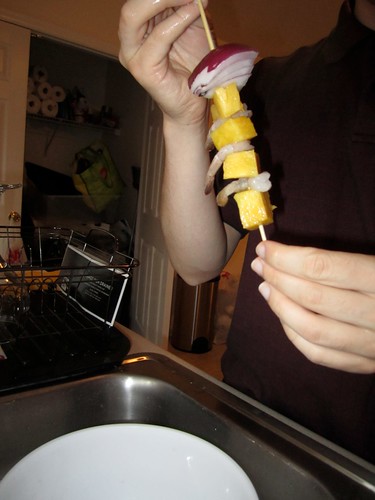
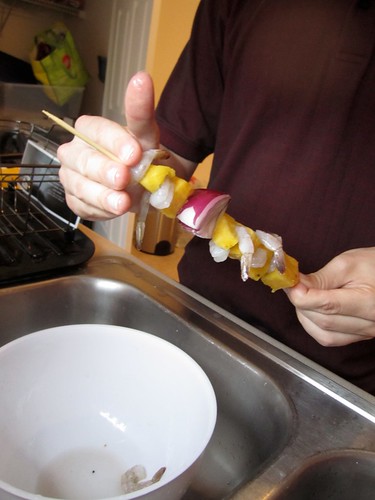
Recruit a partner to help skewer the ingredients. I go every other pineapple, shrimp, pineapple and so on. Make sure you have a pineapple on each end; this helps keep the slippery shrimp in place, and boosts them off the grill. Put a red onion quarter/eighth near the middle of the skewer. Keep going until all skewers are full! We got 6 skewers out of the ingredients listed. It just depends on the size of your shrimp and pineapple pieces.
IMG_4285

IMG_4289


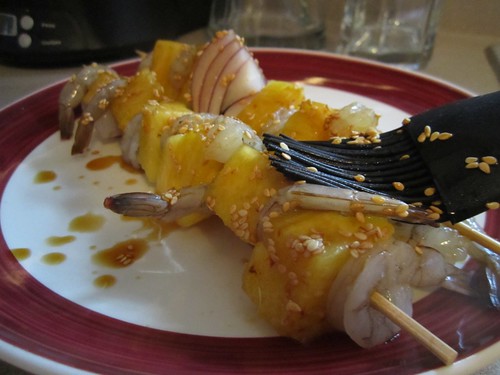
Use a silicone basting brush to brush on the sauce/seed mixture. The silicone really grabs the seeds, I was pleased with how easy this made it. Just brush them off on the pineapple chunks!

IMG_4276

Grill for about 6 minutes, turning once. Shrimp are done when pink. Make sure they aren't grey, but don't leave them on the grill to dry out!

IMG_4301


Tips:
*to pick a pineapple, look for 3 things: color, smell, leaves. Color: it should be yellow, not green or brown, over much of the outside. Some green or some brown is ok, but too much means its either not ripe yet or past the ideal. Smell: if you smell near the base of the pineapple or the yellowest parts, it should smell like pineapple! Funny thing, huh? Leaves: my mom's fiance Steve swears by the leaf trick; grab a leaf and pull... if it comes out, its probably ripe. If they don't budge, don't buy it.
* you can easily sub a can of pineapple chunks if fresh pineapple isn't affordable/available/ripe.
* grill the extra pineapple to serve with vanilla ice cream for dessert. You can chill it a couple of days and then nuke it for a few seconds and it will still have that smokey grilled flavor. You can even make a simple glaze for it... though I bet a simple carmel sauce drizzled over it would be yummy.
* this can be prepped a few hours in advance. Then you're all set to throw them on the grill at dinner time! I wouldn't do it more than 4-6 hours early... you don't want the pineapple to dry out or anything weird. I'm too excited to eat this recipe to try longer advance prep times!
* Get the kids involved making their own skewers! Just be sure to help them with the onions (if they want onions... I don't eat them, but Brian loves them) since they can be tricky to stab through.

Notes on skewers: Some people swear by metal skewers. I haven't gotten around to buying a set yet. I find the wooden ones you pick up at the grocery store work fine. For shrimp, you don't usually have to do the pre-soak step because the cook time is so short. However, if you want to cook something that has to be well done (like chicken, or thick steak), soak the skewers in water for around 20 minutes before you load them up and grill. Once we get to more chicken and beef grilling, I may revisit my stance on not getting the metal ones. ;)


Tonight I served the kebabs with sliced French bread. It was handy and quick. This is also lovely with rice, cous cous, or grilled pita or naan slices. Start the meal with an appetizer salad while you wait, or be sure to have an extra helping of greens at lunch. ;) Just don't try to do too much once the kebabs are assembled - shrimp grills up really fast! (And gets cold quickly.)

IMG_4308

Joyfully,
Kristen


PS: I just hit 1000 site visits! Thanks guys! :D

Thursday, February 3, 2011

Cooking with Isaiah

Hello everyone! We've had quite a month here in New England; locally I think we've topped 50 inches this month?? That just sounds insane to a little desert born thing like me. Last week I officially joined the ranks of true Bostonians though... and placed a lawn chair in my dug out parking spot. Brian spent over an hour shoveling it out after the prior week's huge two days of school canceling storm. And within about 20 hours, someone had stolen it from him. He only got to park in it once, and he was very thorough since he intended to keep it. He was so excited; its the best spot on our street (for our house anyways) and he was in it before the snow started! So last week I shoveled it (miraculously empty in the morning when accumulations started!) and staked my claim. Kept thinking of the boston.com ads while I did it too... "this is not your boston". Tee hee.


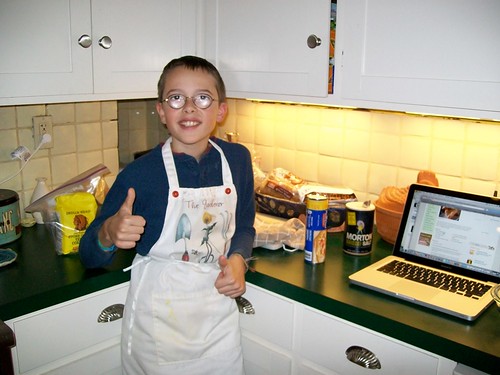
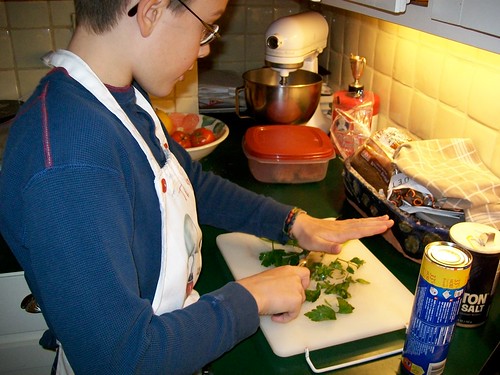
A good bit back now I had the pleasure of preparing a meal with one of the kids I work with, Isaiah. He has recently taken an interest in cooking, and asked me one day when I was tutoring him if I would teach him to cook. As a teacher, and a big fan of food, that's a hard request to turn down! After a very successful batch of peanut butter cookies one night, we planned a meal together. He even helped me type up the recipe and our thoughts on it after we finished and cleaned up. I give you;


Pepperoni Calzones

1 tube of Pilsbury Pizza Dough
Cornmeal for sprinkling
1 egg, beaten
1/3 grated Parmesan cheese
1 2/3 cup shredded mozzarella cheese
1 1/2 tbsp minced Italian parsley
1/8 teaspoon salt
20 pepperoni slices
1/3 cup milk
red sauce for dipping

1) Gather your ingredients.
100_1051

2) Heat the oven to 425*F

3) Prep any ingredients (chop parsley, measure ingredients, etc.)
100_1052
100_1053

4) Mix the filling ingredients in a medium bowl: 1 egg, parmesan and mozzarella cheeses, parsley, salt, and milk.
5) Sprinkle cornmeal on a cookie sheet.
6) Put the pizza dough on the cookie sheet and cut it into four even pieces.
7) Put about 1/4 of the cheese and parsley mix on each dough piece. Add 5 pepperoni to each.
8) Fold each calzone over and pinch seams together. Use some water to be sure they really stick! Otherwise the filling can leak out (messy).
9) Bake in preheated (425*F) oven for 12-15 minutes, until golden brown.
100_1055
100_1056
10) Serve hot, with red sauce for dipping!
100_1057

Tips: For really picky eaters, leave out the parsley. The "green bits" are just a little too suspicious…


Next time, I'll try:
We should leave more room at the edges. Our filling leaked quite a bit. We need to be really careful about pinching the two parts together.

Monday, October 18, 2010

Vegetable Drawer Soup and Chicken Pot Pie

Since I roasted that chicken, I had a ton of leftovers to use up! Its actually one of my favorite things about that recipe. I even buy chickens a little bit big on purpose. :)

Some of my favorite meals use up chicken leftovers... or turkey. These are both great recipes for holiday leftovers too. ;)

The first one was one my mom made when I was little. It always seemed like a perfect meal in one dish to me. Plus, you can use your favorite vegetables or whatever you have on hand.

Chicken Pot Pie
idea from mom, execution modified by me

2 cups (approx) cooked chicken pieces
1 cup carrots, cut into pieces
1 cup brocolli
half a medium onion, chopped into small pieces
1 cup corn (if frozen: thaw in a bowl of warm water. fresh: cut off cob. canned: please don't!)
1/2 cup celery
1 can cream of chicken soup
water
1 tbsp olive oil (or pam)
2 Pie crust pieces (I like Pillsbury) near room temp

Spray frying pan with pam, or heat tbsp olive oil in frying pan. Cook up the onions until beginning to become clear. Add soup and 1 can of water to the pan, bring to a simmer. Add remaining veggies and chicken. Let it simmer for a few minutes to heat everything while you prep the crust.
If you forgot to leave the pie crust on the counter for a little to bring the temperature up, stick it in the microwave for about 5 seconds. You just want it closer to room temp so its easy to roll out. You can also stick it on top of the oven while it preheats.
Roll the first crust out onto the bottom of your glass pie pan. Press it down into the bottom edges.
Pour the chicken mixture into the crust lined pan.
Roll the second crust out over the mixture. Press the two crusts together so nothing oozes out. Put four or five slits in the crust for steam to get out.
Bake for 25 minutes in a 350*F oven.
Put a pie shield or strips of tin foil over the crust edges and bake for 10 more minutes. Pie is done when crust is golden brown.

Let it stand for 10 minutes, or as long as you can stand! I cut in right away and it was a little messy. Pieces will serve prettier if you can wait. :)
Messy enough I needed a spoon to serve it!


The second one was named by my mom. We've done this one pretty regularly since weight watchers while I was in high school. Difference was they called it "Zero Point soup" and it didn't have chicken (or noodles, I think). Its extremely versatile and adds great variety! Just use whatever you have on hand! No noodles? Use rice! All measurements in this are APPROXIMATE. I don't measure!! I just dump things in until I like the color balance. Add more liquid than you think you need! It cooks down a lot!

Vegetable Drawer Soup
from my mom, originally

2 cups cooked chicken, torn or cut into bite size pieces (OR 2 chicken sausages, cut into slices and then halves)
3-5 cups sliced veggies: carrots, celery, green beans, peas, corn, brussel sprouts, peppers, asparagus, mushrooms... ANYTHING you want!
3 cups chicken broth (bouillon cubes work nicely, just read the label for appropriate water amounts)
2 cups egg noodles (or rice or cous cous)
2-3 bay leaves
a few dashes each of oregano, basil, red pepper flakes, whatever your favorite spice is, that you are feeling at the moment (I don't often do red pepper flakes, for instance.)
extra water, as necessary

Put a LARGE pot on the stove. Add broth (or water with bouillon) and start to warm. Add the thickest crunchiest veggies first; carrots and brussel sprouts especially. Add chicken, spices, and remaining veggies (except any that might get mushy... like I tend to add mushrooms or spinach with the egg noodles or rice for the last 20 minutes). Stir, add water or more broth if it looks off balance. Bring to a boil, stir, reduce heat and let simmer. Cover or you'll lose even more moisture! Let it simmer for at least 20-30 minutes. Feel free to taste it as it goes, there is nothing raw in it (chicken sausage is pre-cooked). After first 30 minutes, when flavors are mingling to your satisfaction, add egg noodles or rice and any remaining soft veggies. Cover, cook for an additional 15-20 minutes or until noodles or rice are soft.

One of my favorite versions of this ever had italian chicken sausage, leftover cous cous/rice blend, spinach, and brussel sprouts. YUM.

Monday, October 4, 2010

Roast Chicken

Last night week I roasted a chicken. This is one of my favorite fall and winter meals, and the leftovers are spectacular. Like many meals, I tend to do this one when the meat is on sale, but sometimes I'm just craving it. This last week it was on sale and I realized it was finally heat-up-the-whole-house-using-the-oven season.

I first learned to roast chicken from a cookbook Brian's aunt gave me called "How to Cook Everything".
This recipe alone has made the gift a great purchase. I really enjoy the number of variations offered on the staple items like this.

The basics of this chicken, boiled down; Start heat high, baste a ton, turn the heat down once browning to cook the insides.

100_0466

Roast Chicken
from How to Cook Everything

1 whole (3-4 pound) chicken, trimmed of excess fat, then rinsed and patted dry with paper towels
3 tablespoons olive oil
2 teaspoons chopped fresh thyme, rosemary, marjoram, oregano, or sage leaves (or 1 teaspoon dried)
salt and freshly ground pepper to taste
chopped fresh herbs for garnish

1) Preheat oven to 500*F

2) Place the chicken breast, breast side down, on a rack in a roasting pan. Begin roasting. Mis together the olive oil, herbs, salt, and pepper.

3) After the chicken has roasted for about 20 minutes, spoon some of the olive oil mixture over it, then turn the bird breast side up. Baste again, then again after 7-8 minutes; at this point the breasts should be beginning to brown (if it hasn't, roast a few more minutes).
100_0460
Turn down the heat to 325*F, baste again, and roast until an instant read thermometer inserted into the thickest part of the thigh reads 160-165*F. Total roasting time will be under an hour.

4) Before removing the chicken from the pan, tip the pan to let the juices from the bird's cavity flow into the pan (if they are red, cook another 5 minutes). Remove the bird to a platter and let it rest for about 5 minutes. While it is resting, pour the pan juices into a clear measuring cup, and pour or spoon off as much of the fat as you can. Reheat the juice, carve the bird, garnish, and serve with the pan juices.

100_0462


I made a simple gravy out of the juices this time, but my gravies need some work. :-/ I had way to much flour and it got really thick. I'll work on that one before I post tips. :p We had mashed potatoes though... if you don't, the juices are plenty with the chicken.

TIPS:
* If your bird is bigger, roast longer. (Simple, right?) I find my 5 pound birds go about an hour and 15-20, but I don't watch the clock super closely.
* Don't depend on the pop out timers. I've cooked this many times, and its far better if you trust the instant read thermometer. Sometimes the other is a little long and it dries out some.
*If you don't have a roasting pan, invest in a good one if at all possible. The teflon flaked off my first one right away, so I'm back in the market. :(
* When in doubt, baste baste baste!! It comes out super juicy and just a hint crunchy in the skin, and its really not much extra work. If you're like me you're already hiding in the kitchen near the warm oven or working on sides anyways. :)

100_0469
Remember; Don't trust the pop up thermometers!! Good on turkeys, not with this recipe. Not for me, anyways.
And yes, my book always has at least that many post it tabs. Its full of awesomeness!!


PS: I am using the amazon associates feature. This means I get a small cut if you buy something I recommend. I am not in it for profit, I just find it convenient for mentioning products I love. I felt being upfront about its presence was important. Please don't feel that I expect anything.
That said, know that any small revenue made there will likely go to food or cooking tools! XD

Print

Related Posts with Thumbnails