Showing posts with label pictures. Show all posts

Sunday, November 3, 2013

Harvest Squash, Veggie, and Pumpkin Lasagna

I had this idea about a week ago. It was vaguely inspired about a month ago by a dish at a restaurant, but I knew I wanted to do something different. Last weekend as we brainstormed our meals for the week I hatched a real plan for the dish.

It. Was. Epic.

Now I normally don't oversell my dishes (*cough*snickerdoodles*cough*) but this one... it blew my mind. After I put it in the oven I fretted over ingredients that might have made it better. It was superb the way it was. Perfect Sunday dinner, with spectacular leftovers for Monday lunch. This is an instant hit for the "if I open a restaurant, I'll serve..." list.

Wonderful winter squash lasagna with pumpkin, zucchini, and corn. From joyfulfoodie.com

Harvest Squash, Veggie, and Pumpkin Lasagna
a Joyful Foodie original recipe

Saturday, August 31, 2013

Busy summer!

So, its been a few weeks. So much for hitting the blog hard this summer, eh?

Really, this is just a quick check in. I'll be along with some food in the next week or two.

What have I been up to?

Honeymoon!


We went to St. Lucia for a week at the beginning of August. Talk about AMAZING. We realized while there that this is the first "grown-up" vacation I've ever taken. I only ever went home for school breaks, and we've only done 2-3 day weekend jaunts before. I guess the Boston trip last summer counts for something, but that was more visiting friends and family than getting away just to unwind and sightsee. This was sleeping in, eating out, catamaran touring, ocean swimming, rum drink sipping relaxation. I've got some food posts to share out of this one, trust me! My favorite food memories? Eating at a hotel where the chef had made the reservation for us, perfectly cooked rack of lamb, fried plantains (I made those!) and creole breakfast with salt fish and floats. Also the Chairman's reserve spiced rum. Makes the most delicious rum and coke... you can taste and distinguish actual spice flavors, which is so cool. :) And the Piton beer reminds me of meals with my Farfar, who's beers of choice were Carlsberg and Heineken... it had that kind of flavor to me.


Reading!


The books on the left are ones I've already finished in August (three were on the kindle), and the ones on the right are my "next up" stack. :)


Reading. TONS. I read 10 books in the month of August. Instead of defaulting to "what do I want to watch" and grabbing the remote, I've been reaching for my book. Its been AWESOME. If you check out my 29 by 29 list (see tab above) you can follow my list. Just finished Jurassic Park today, only took me three days (and this, after school has already started!) Earlier this week I read Before I Go to Sleep by S J Watson, which was so phenomenal I read it in just TWO DAYS. I got the book from the library Tuesday and finished it Wednesday. I thought about it every time I had a break at school Wednesday too. XD


New classroom!


Started a new job! I am now at a middle school (again) teaching 6th grade science and social studies. So far I LOVE IT. My kids are great, my team is great, my principal is great. I'm really happy to not have the super long commute, it makes such a huge difference to the day. I actually have time and energy left to be helpful and interesting at home. This week I helped make dinner last Monday, cleaned up from dinner a couple times this week, did general chores including a load of laundry on Wednesday, etc. It doesn't sound like much, but its a move in the right direction from it being mostly Brian handling everything to me being human enough at the end of a work day to take some of that off his shoulders. Even if it is just cleaning up a meal instead of grouching that the kitchen is messy, its big steps here. I am so happy to be at a place where I can serve a group of children and my own family in such a balanced and fulfilling way. Now I'm just looking at keeping that balance once the paper grading starts!


New haircut!!


(Terrible pic, but I'll get some better ones this weekend, whatwith labor day festivities.)
I swore I would do it someday, and I finally did. I went with some slightly conservative side swept bangs, since I was a little nervous to make the leap, but they are super cute. Finally I love pony tails on me! Now I just need to get the gym thing happening again so I can rock that look in public. Usually, pony tails are reserved for cleaning, super hot sticky weather, and ugh I can't deal with you (which happens less right after a haircut!). The inspiration pictures ranged from Victoria Beckham (extreme end) to Sandra Bullock (conservative end). My stylist nailed what I was talking about. :)

What was your favorite way to stay busy this summer?

Friday, June 28, 2013

Friday Five

Boy, we sure have hit summer running around here!

  • Drove up to NY last week: BIL (brother in-law)'s graduation, a beach trip, wedding shop talk, 32nd anniversary dinner, and much catch up time. Just generally a great time visiting with the folks/future in-laws.
  • Just got back (Tuesday) from said week up on Long Island.
  • Yesterday marked t-minus one month until the wedding. (!!!)


I'm back to menu planning. WOOT! I missed knowing the plan for the week. We're only two weeks into vacation and I already feel a million times more human. Follow me on twitter to get weekly menu updates! Recipes to follow, here, as quick as I'm able.


The Friday Five

I'm trying to appreciate the little things, and hoping to make this a regular thing. Here'shoping it sticks!

1) Lobster. I got two stellar doses in NY: a stuffed lobster and a lobster roll. I hadn't had a truly awesome lobster roll in a couple years. Well, not one out at a restaurant. Florie made pretty stellar ones when we visited them last summer in Rockport. We ate at Lunch (officially named The Lobster Roll) near the Hamptons. This one was epic, with huge pieces of claw meat, the way a good lobster roll should be. The stuffed lobster at Sea Basin had crab meat stuffing and bay scallops. It was way too much food, and I loved it.


2) Kittens. Its amazing how much you can miss their snugglyness in one short week!

3) Goodbye visits with awesome friends. So sad Lisa is moving, so glad I got one last visit while she's here! Plus, she awesomely helped me make all the fans for our wedding.

4) Gym membership. I finally re-joined a gym, and had my first workout yesterday. It felt so good to do something awesome for me!

5) Michaels. *sigh* Shame I always spend too much. It's my favorite place to stock up on thank you notes!


Now, to try the pool. Got our new pool membership card a couple of weeks ago, but its been a) raining, or b) out of town, or c) chilling with friends, nonstop since then. Hopefully we can beat the rain this afternoon! If we manage, you'll see some pool pics on next week's Friday Five.


Saturday, May 5, 2012

Sangria Saturday

Happy Cinco de Mayo, everyone! I know for most Americans this is just an excuse to have a taco and a Mexican beer, but the holiday does of course have deeper roots. Fortunately, recent years have brought us ignorant Americans greater enlightenment, so most people no longer believe that it is a Mexican Independence day. Before that wide information wave, the rumor probably started because 5th of May sounds so much like the 4th of July, but Mexico's independence is celebrated on September 16th. El Grito de Independencia is marked as the day that Father Hidalgo (and others) rang the bell of a local church to signal the start of their fight for liberty from Spain. My understanding is that original plans had the revolt starting in October, but they were discovered and started things a bit early. Just like my rum mixing this morning. ;) ;)

No, Cinco de Mayo marks the Battle of Puebla, an unlikely win the Mexican army pulled against French forces during the American Civil war. That was about 50 years after Hidalgo did his thing.

And since the Spanish had nothing to do with Cinco de Mayo, I have no problem serving (vaguely) Spanish Sangria at my boyfriend's birthday party tonight. While I love celebrating Mexican heritage and culture (and all cultures!) I love celebrating him more. ;)


The ingredients for this recipe are approximate, and per pitcher. If you are having more than 6-8 people over, I recommend 2 pitchers and up. You don't need very many glasses of this stuff to really really feel it, but it is super tasty with all the fruit and people will come back for more! The apples soak up rum really well and give a great burst when you bite them. YUM.

Sensational Sangria
a joyful foodie original

Ingredients:
750ml bottle of red wine*
1 1/2 cups spiced rum
1/2 cup sugar
1 orange, sliced
1 lemon, sliced
1 lime, sliced
1 apple, cubed
any extra fruit you can find, including strawberries, blueberries, peaches, plums, pineapple, mango, etc. (I've never tried banana...hm.)
1 can lemon-lime soda or flavored seltzer

Directions:
Wash ALL fruit (even the citrus, the peel is going in the pitcher). Slice all citrus into thin rounds. (Be sure you start at the stem, so you get a nice cross section. Chop the apple into bite size pieces. Add rum, sugar, and fruit to a pitcher. Stir or swirl to make sure the sugar isn't sitting on top of the fruit and is down in the rum and to coat all fruit.
Great pitcher drink for backyard bbq parties, cinco de mayo celebrations, taco night... favorite go to spiced rum drink!

Chill for at least 6 hours, overnight would be best! You can speed it up if you must, but maybe use simple syrup instead of sugar so it is dissolved.
In the morning, or at least 2 hours before party time, add the red wine and continue chilling.
When ready to serve, add 1 can of lemon-lime soda OR 1 1/2 cups of seltzer in a complementary flavor (think: mixed berry seltzer if you went heavy on the berries, etc).


*Red wine note: I've always used box wine. That works out to be 3.17 cups of red wine, so I do basically 3 1/4. A little extra wine won't hurt. ;) If you want to use an actual bottle, I've heard really good things about Blackberry Merlot in this recipe. :)


Tips and tricks:

If you are an organic produce shopper, this might be a good occasion to bend your rules. Usually, you only need to buy organic produce that you will not peel, ie apples, pears, berries, etc. However, the whole peel is going in the pitcher on this recipe, so if you are really conscious of pesticides etc, consider picking up all your fruit on the organic wall of your local shop this time. :)


If you are having a big big party, and going big punch bowl with this one, you can expect to need something more like:
2 apples, 3 oranges, 3 limes, 3 lemons, 2 quarts of strawberries, and much more of a 5L box of wine!

Depending on your punch bowl this is super easy to scale. Basically, you want 1/2 cup sugar and 1 1/2 cups rum for every three cups red wine. Keep in mind that a box of wine is almost 7 bottles (like 6 2/3), so you can scale up a LOT with one box, but you will need extra bottles of rum. (I need a whole 750ml bottle of rum for 3 pitchers, consider doing a handle if you are scaling up a lot.)
Add as much fruit as you want from there!! The more the better, really! It makes the punch bowl super pretty and adds such great flavor.


If you don't have a punch bowl and want to have refills handy, soak extra fruit in rum and sugar in a sealed container in the fridge. Then you can add to the pitchers as necessary throughout the night. The balance won't be quite the same, or mingled, but people will be quite a bit along and they won't notice. ;) Do keep an eye on the fruit though, as people tend to try to snitch pieces. XD


Whatever you are up to this lovely cinco de mayo, I hope you have a lovely time at it. And maybe have an extra one for me. ;)


Edit 2/10/13: I'm trying to make my recipes more printer friendly. If you like this format for printing, please do drop a comment and let me know so I can decide how best to proceed with user-friendlyfying this place!

Friday, January 13, 2012

Chocolate Lava Cakes


Ooey Gooey chocolatey goodness! Ultimate warm chocolate dessert, easy to make, you probably have all the ingredients in the cabinets already!


I am so excited about this recipe I have to start the post before they are even finished cooking!! The last chocolate lava cake recipe I tried was from Cooking Light. They were just OK. They called for espresso powder and I found they were just a little too... dark. The flavor was kinda smokey. Don't get me wrong, we ate most of the cakes the batch yielded, but I knew there had to be better.
Tonight's recipe came from my new favorite blog. I found it while trying to refresh my memory on an old favorite salmon recipe. The pictures are gorgeous, the recipes simple and encouraging, and the whole thing made me completely miss cooking. As you may have noticed (or forgotten due to my looooooong absence), I have had a new teaching position this year. (Did I even mention? 4th grade math.) It has been exhausting (beyond any teaching job I've had before, with the exception of student teaching and the semester with mono).

Brian has done all of the cooking since I got the job.

I think I have made breakfast two or three times on the weekends. And there was a chicken pot pie (which he learned how to make and made the next time). And something else more recently... that I can't remember.

So when I stumbled on this blog tonight, I was... engrossed. Perhaps obsessed. Every few entries was another "ohhh, I want to try this one" or "Oooooh, look at this picture!!" So while Brian finished making our salmon dinner, I read about lemon poppyseed cake and latkes and chocolate lava cakes. After dinner I seemed restless. When queried as to what was the matter, I whined, "I miss cooking." Brian asked if I wanted to make dessert. He had trouble reading my reaction, as I limped my tired feet back to the couch to check the still open laptop. Did I have the ingredients for those magically looking molten chocolate piles of heaven?? Butter... check, Brian restocked tonight. Eggs... check, exactly the right amount. Flour... always. Semi-sweet chocolate... I buy the chips in bulk at Costco. Powdered sugar... I always have powdered sugar, in case there is a frosting emergency. And whipped cream. Hmmm. Maybe?? There was a can at least... maybe?? Brian checks; there is! HOORAY! I leap into action.

Everything on the counter.

No powdered sugar.

I realize then that I have not baked since we arrived in August. Well, French Toast while the family was still here. But not a cake. Nothing with icing. All the powdered sugar I remembered was in Massachusetts. Not North Carolina. I had decided it was cheap enough to not bother packing, and left it for the roommate (who also bakes). That would save me worrying about a powdered sugar explosion in the moving boxes.
Then I got the job. And stopped cooking, for reasons of sanity. Lesson plans, assessments, paperwork, new acronyms, filing systems, 53 fourth graders (at last count, if the "he moved" rumors prove false). o.0

Brian, seeing my disappointment, ran to the store. Is that love or what? (I joke sometimes I can't tell if it is of the dessert or me, but we all know. <3

Molten Chocolate Lava Cakes
from Rachel at homesweetandsavory

Sunday, August 14, 2011

New Grill -- Shrimp and Pineapple Kebabs

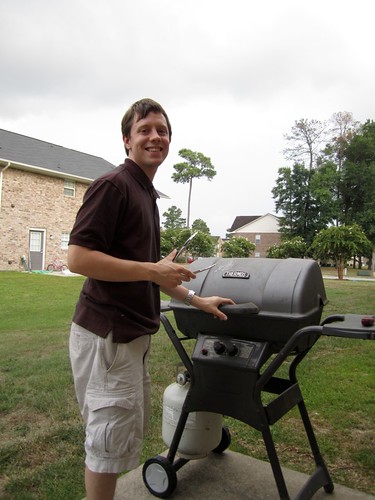
There is nothing like grilling in the summer. We've been fortunate in Boston to have either my landlord's grill or my roommate's grill, so we've never had one of our own. Luckily there were never any "ugh, they left the gas on AGAIN?!" moments or surprises. Once we got here it seemed important to find a grill as quickly as possible. It happened pretty quickly... we found one today! Best part? It was free!! Thanks be to craigslist. A very kind gentleman posted a grill his friend had left behind, and was asking $20. The starter is broken, it has some slight cosmetic rust, but it works! And he didn't want a dime. Said he didn't want scrap metal seekers bothering him. Bonus; he took one look at Brian's compact car and threw it in his mini van.

IMG_4300

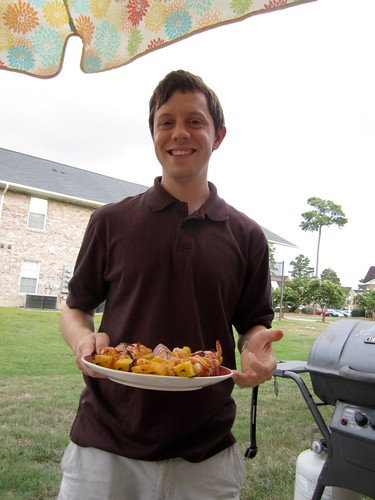
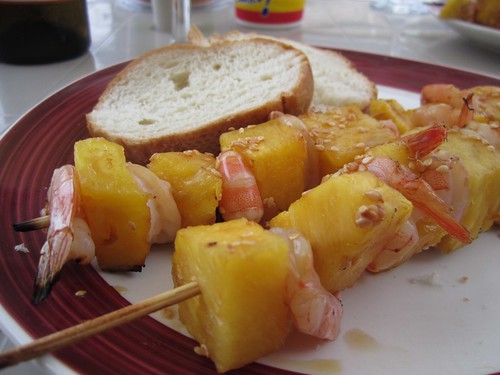
To celebrate, we've had two of three meals hot off the grill today. :D Basic hotdogs for lunch, and never fails to make me swoon shrimp and pineapple kebabs for dinner. Wouldn't you know this is another recipe I can't recall where I first saw it? I know I read it the first time... I've just made it from memory - or as close as I can get - every time since then.

Shrimp and Pineapple Kebabs
from ???

40 raw shrimp, peeled and deveined (tails on)
1 pineapple (you'll use about 3/4 of it)
1 red onion
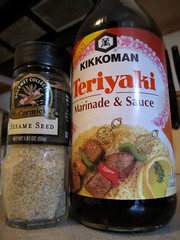
1/4 cup teriyaki sauce
1 tbsp sesame seeds

Cut up the pineapple; start by cutting off the top leafy part. Then cut down the sides to shave off the outside spiny bits. Then cut off the bottom outside bit. If you look at the middle, there is a core - this part is woody and not good for nomming on. Cut off sections of the pineapple leaving that part behind, just like you would an apple. If you cut too far into it, you'll know, just trim it off. Cut those pineapple portions down into rough cubes, about 1 inch chunks. The idea is that the pineapple will char before the shrimp, and help protect it from overcooking and drying out, so don't get them too small. Plus, they split when skewered if they're too small.
Of course you can skip all that if you are substituting canned pineapple cubes. ;)

Cut the red onion into quarters or eighths (depending on number of skewers planned, and how cooked you want the onion). My pictures show eighths.

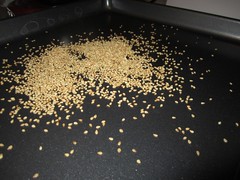
Toast the sesame seeds for a couple of minutes. Do not burn them! I find 4 minutes at 350*F is usually enough, it may finish faster in a toaster oven (I don't remember toaster times, and don't have a new toaster yet to try it).
IMG_4265

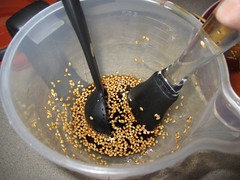
Mix the sesame seeds with the teriyaki sauce.
IMG_4272 IMG_4282

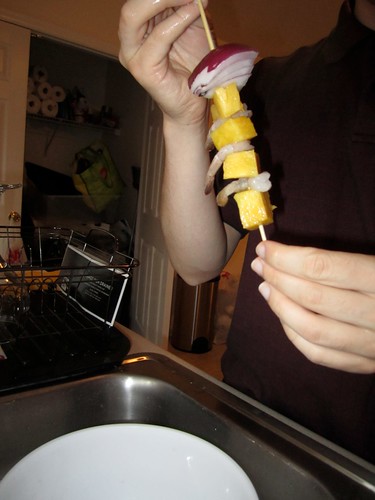
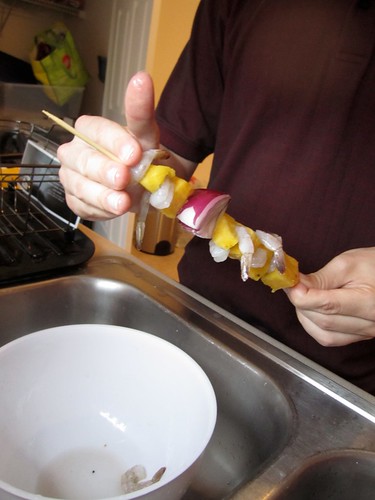
Recruit a partner to help skewer the ingredients. I go every other pineapple, shrimp, pineapple and so on. Make sure you have a pineapple on each end; this helps keep the slippery shrimp in place, and boosts them off the grill. Put a red onion quarter/eighth near the middle of the skewer. Keep going until all skewers are full! We got 6 skewers out of the ingredients listed. It just depends on the size of your shrimp and pineapple pieces.
IMG_4285

IMG_4289


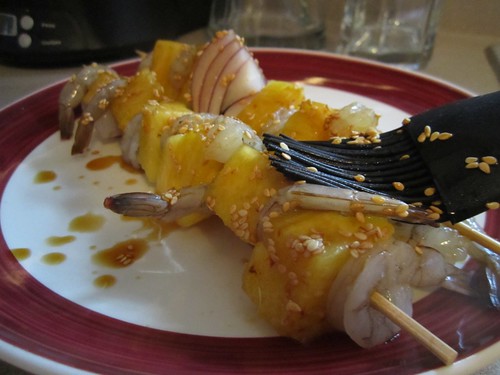
Use a silicone basting brush to brush on the sauce/seed mixture. The silicone really grabs the seeds, I was pleased with how easy this made it. Just brush them off on the pineapple chunks!

IMG_4276

Grill for about 6 minutes, turning once. Shrimp are done when pink. Make sure they aren't grey, but don't leave them on the grill to dry out!

IMG_4301


Tips:
*to pick a pineapple, look for 3 things: color, smell, leaves. Color: it should be yellow, not green or brown, over much of the outside. Some green or some brown is ok, but too much means its either not ripe yet or past the ideal. Smell: if you smell near the base of the pineapple or the yellowest parts, it should smell like pineapple! Funny thing, huh? Leaves: my mom's fiance Steve swears by the leaf trick; grab a leaf and pull... if it comes out, its probably ripe. If they don't budge, don't buy it.
* you can easily sub a can of pineapple chunks if fresh pineapple isn't affordable/available/ripe.
* grill the extra pineapple to serve with vanilla ice cream for dessert. You can chill it a couple of days and then nuke it for a few seconds and it will still have that smokey grilled flavor. You can even make a simple glaze for it... though I bet a simple carmel sauce drizzled over it would be yummy.
* this can be prepped a few hours in advance. Then you're all set to throw them on the grill at dinner time! I wouldn't do it more than 4-6 hours early... you don't want the pineapple to dry out or anything weird. I'm too excited to eat this recipe to try longer advance prep times!
* Get the kids involved making their own skewers! Just be sure to help them with the onions (if they want onions... I don't eat them, but Brian loves them) since they can be tricky to stab through.

Notes on skewers: Some people swear by metal skewers. I haven't gotten around to buying a set yet. I find the wooden ones you pick up at the grocery store work fine. For shrimp, you don't usually have to do the pre-soak step because the cook time is so short. However, if you want to cook something that has to be well done (like chicken, or thick steak), soak the skewers in water for around 20 minutes before you load them up and grill. Once we get to more chicken and beef grilling, I may revisit my stance on not getting the metal ones. ;)


Tonight I served the kebabs with sliced French bread. It was handy and quick. This is also lovely with rice, cous cous, or grilled pita or naan slices. Start the meal with an appetizer salad while you wait, or be sure to have an extra helping of greens at lunch. ;) Just don't try to do too much once the kebabs are assembled - shrimp grills up really fast! (And gets cold quickly.)

IMG_4308

Joyfully,
Kristen


PS: I just hit 1000 site visits! Thanks guys! :D

Welcome to NC Baked French Toast

I've officially moved. Not the usual blog announcement kind of move... I'm on the same host site and server, all the usual. In fact I've been reminded its time to renew my domain name, so I may actually get around to linking that up soon.
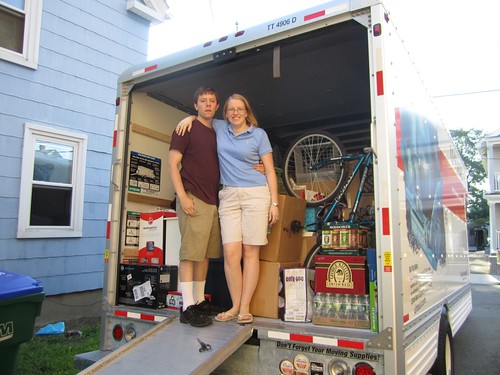
No, this time its the good old fashioned move. The kind that requires lots of boxes.

IMG_4021

Two days of driving later, Goodbye Boston! Hello North Carolina! Its hot, its humid, but hey it is August... its all down hill from here!

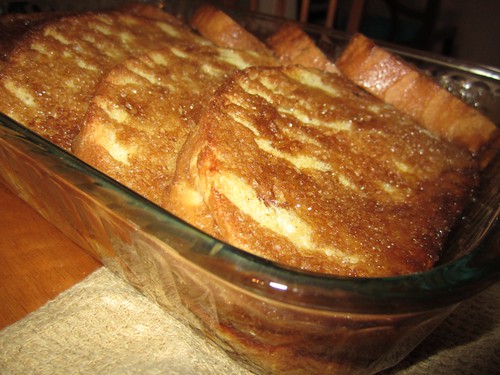
First night was the traditional order pizza and colapse sort of evening. Day two we... well, Brian and his brother... emptied the truck. Brian's sister and I started unpacking! So we had a fair amount of the kitchen out of boxes by dinner, and Brian made us a lovely Chicken Parmesan. I got adventurous and made a soak-overnight-bake-in-the-morning French Toast.

IMG_4122

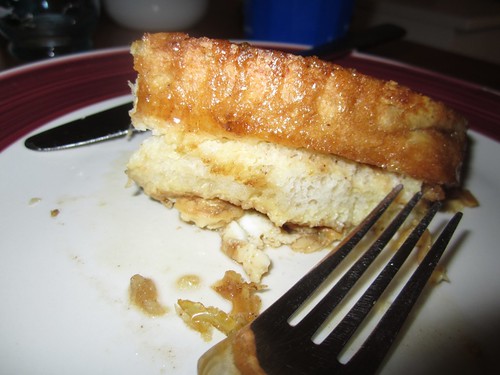
I've done one/two slices at a time in the frying pan French Toast. I've done stuffed French Toast. But this was new. I really like how it turned out! I started with a pretty basic recipe, and modified it based on what we had on hand. Brian stuck it in the oven before I got out of bed, so I didn't do the final "flip the bread over" step to make sure it was evenly moist. I liked the effect though... the crunchyness was not overwhelming and gave a nice texture contrast. Especially after pouring the melted butter and brown sugar on top. Mmmmmm. It was so good, we didn't even use the maple syrup.

Baked French Toast
modified from recipes of assorted contributors on allrecipes.com

loaf crusty bread (can be a couple days old!)
6 eggs
1 1/2 cups milk
2 tsp vanilla
1/4 tsp of cinnamon
1/2 cup butter
2/3 cup brown sugar (approximately, anyways...)

Cut crusty bread diagonally in 2in slices. (My bread was pre-sliced at the bakery, this time.) Arrange bread in the bottom of a rectangular baking dish, such as pyrex.
In a medium bowl, beat eggs, milk, vanilla, and cinnamon until combined. Pour over the bread, making sure to drip it down all parts of bread that are showing. Cover (my pyrex has a matching lid, or you can use foil or plastic wrap) and refrigerate overnight.

In the morning, take the pan out of the fridge while you heat the oven to 350*F. This will let the pan warm a little so you're less likely to shock the pyrex (and break it). Turn the bread over to make sure both sides are moist. (I mentioned before we skipped this step - still turned out fantastic!) Bake covered with foil for 20 minutes. (I think we had it uncovered... oops? Again, loved it anyways!) While it is baking, heat the butter in a small saucepan. Once it is melted through, remove from heat and mix in the brown sugar and stir until completely dissolved. Pour as much as looks good over the french toast and bake for another 20 minutes uncovered. Serve with maple syrup if desired, but I found the brown sugar butter was syrup enough! :)

IMG_4127


Possible modifications;
* sprinkle with raisins before baking.
* use a mix of milk and cream or half and half (original recipe suggested 2 cups milk and 1 1/2 cup half and half or using JUST half and half. I modified it partly because milk is what I had on hand and partly for the calories!)
* make it in the morning, if you forget the night before! Stick it in the fridge for an hour or two, turn the bread a couple extra times to be sure its soaking in, and bake like normal!
* use as much sauce as looks good! I cut the amount down a good bit and still didn't use it all. Top it till you like the look.
* alternate sauce; I didn't have corn syrup and that looked like too much butter! A phrase I'll have to unlearn here in the South ;)
3/4 cup butter
1 1/3 cups brown sugar
3 tablespoons light corn syrup
In a small saucepan, combine butter, brown sugar and corn syrup; heat until bubbling. Pour over bread and egg mixture.


Anyways, everyone claimed to enjoy it, and I had a blast cooking it. It felt really nice to be set up in a new kitchen - that I don't have to share! ...besides Brian. ;) - and back to playing with food. I miss it a lot during those hectic school months. I've got a couple of weeks left before the school year starts. I don't know yet if I'll be at the front of the classroom or the back (Masters degree still lurks...) but I intend to cram as many posts in before it starts and life gets frantic again as I can!

Joyfully,
Kristen

Thursday, February 3, 2011

Cooking with Isaiah

Hello everyone! We've had quite a month here in New England; locally I think we've topped 50 inches this month?? That just sounds insane to a little desert born thing like me. Last week I officially joined the ranks of true Bostonians though... and placed a lawn chair in my dug out parking spot. Brian spent over an hour shoveling it out after the prior week's huge two days of school canceling storm. And within about 20 hours, someone had stolen it from him. He only got to park in it once, and he was very thorough since he intended to keep it. He was so excited; its the best spot on our street (for our house anyways) and he was in it before the snow started! So last week I shoveled it (miraculously empty in the morning when accumulations started!) and staked my claim. Kept thinking of the boston.com ads while I did it too... "this is not your boston". Tee hee.


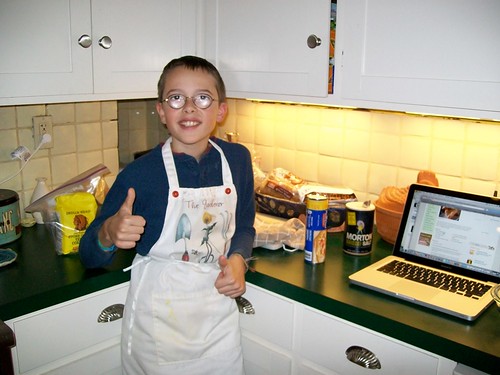
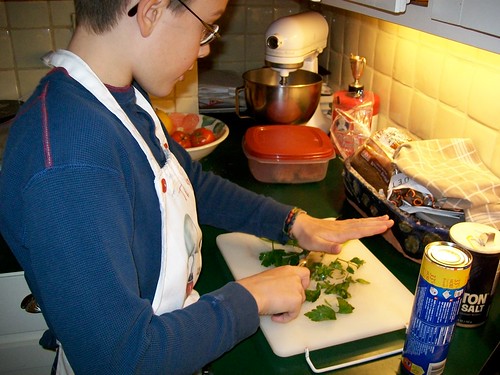
A good bit back now I had the pleasure of preparing a meal with one of the kids I work with, Isaiah. He has recently taken an interest in cooking, and asked me one day when I was tutoring him if I would teach him to cook. As a teacher, and a big fan of food, that's a hard request to turn down! After a very successful batch of peanut butter cookies one night, we planned a meal together. He even helped me type up the recipe and our thoughts on it after we finished and cleaned up. I give you;


Pepperoni Calzones

1 tube of Pilsbury Pizza Dough
Cornmeal for sprinkling
1 egg, beaten
1/3 grated Parmesan cheese
1 2/3 cup shredded mozzarella cheese
1 1/2 tbsp minced Italian parsley
1/8 teaspoon salt
20 pepperoni slices
1/3 cup milk
red sauce for dipping

1) Gather your ingredients.
100_1051

2) Heat the oven to 425*F

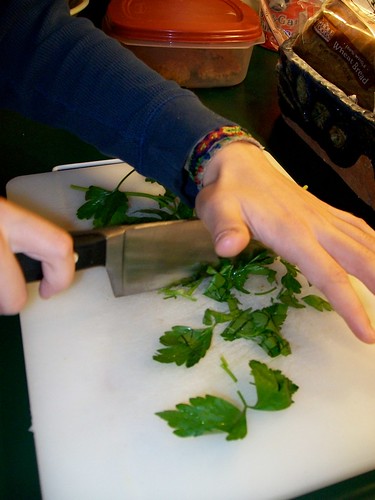
3) Prep any ingredients (chop parsley, measure ingredients, etc.)
100_1052
100_1053

4) Mix the filling ingredients in a medium bowl: 1 egg, parmesan and mozzarella cheeses, parsley, salt, and milk.
5) Sprinkle cornmeal on a cookie sheet.
6) Put the pizza dough on the cookie sheet and cut it into four even pieces.
7) Put about 1/4 of the cheese and parsley mix on each dough piece. Add 5 pepperoni to each.
8) Fold each calzone over and pinch seams together. Use some water to be sure they really stick! Otherwise the filling can leak out (messy).
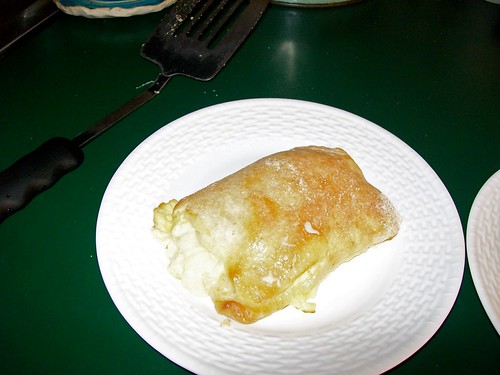
9) Bake in preheated (425*F) oven for 12-15 minutes, until golden brown.
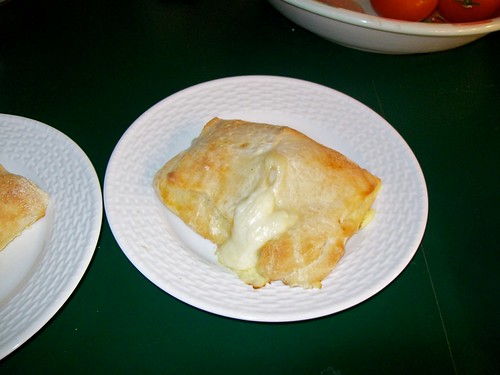
100_1055
100_1056
10) Serve hot, with red sauce for dipping!
100_1057

Tips: For really picky eaters, leave out the parsley. The "green bits" are just a little too suspicious…


Next time, I'll try:
We should leave more room at the edges. Our filling leaked quite a bit. We need to be really careful about pinching the two parts together.

Wednesday, October 27, 2010

Chocolate Mug Cake

You ever have one of those days where you have less than no time, but really just want a piece of chocolate? Better, a piece of chocolate cake? This is that chocolate cake. It will never win an award for beauty and its not the best tasting cake you'll ever eat, but it is fast. How fast, you ask? 5 minutes.

3 minute Chocolate Mug Cake
from an email chain

1 coffee mug
4 tbsp flour (plain, not self rising)
4 tbsp sugar
2 tbsp baking cocoa
1 egg
3 tbsp milk
3 tbsp oil
3 tbsp chocolate chips (optional) mini chips would be the best
small splash of vanilla

Add the dry ingredients to the mug and mix well.
Add the egg and mix thoroughly.
Pour in the milk and oil and mix well.
Add the chocolate chips (if using) and vanilla and mix again.

Put the mug in the microwave and cook for 3 minutes at 1000 watts. The cake will rise over the top of the mug but don't be alarmed! Allow to cool a little, and tip out onto a plate if desired. Eat! This can serve 2 if you want to share.

Tips: Don't add extra time if it looks moist or shiny. It will overcook and be super chewy.
This is great for using the last dribble of frosting out of the can in the fridge, or you can make a simple powdered sugar mix to smear on. Chocolate or carmel sundae sauce works nicely too. :)

This is NOT a pretty cake!! You could probably cut it in half and frost a quick two layer thing out of it, but you were looking for quick, right?? So just don't look at it real hard and enjoy.

Spinning in the microwave... Look at it rise...


It really does cook up over the edge of the mug.


Leaning on the plate.
Yes, its propped up with a toothpick.


The frosting is pink from a birthday cake's leftovers. XD
It looked better on the birthday cake, I promise.


This was definitely the type of weekend where I only had 5 minutes! We moved Brian in to my apartment, and cleaned everything. It looks fantastic, I'm very proud. :) I did resist the siren call of the chocolate mug cake this week though, these are pictures from last time. I'm looking forward to apple pies this week. ;)

Wednesday, October 20, 2010

Snickerdoodles

I boast some pretty awesome recipes. Some I've made up. Some I've HEAVILY modified. And some I follow to the letter. Some I can easily credit to the original owner, and some it is a complete mystery as to where they came from. I suspect your recipe box/bin/book is similar.

My Farmor (Father's Mother, in Danish) has left many mysteries, since she rarely wrote down recipes and did everything "to taste" or "until it looks right". A lot of pinches and smidges on her cards. (My style is starting to make sense, I suspect.) You'll hear a lot about her on here, she's quite an inspiration.

My snickerdoodle recipe is one such mystery. My recipe card was carefully transcribed from one in my mom's files. However, she swears its my recipe... she doesn't make them.

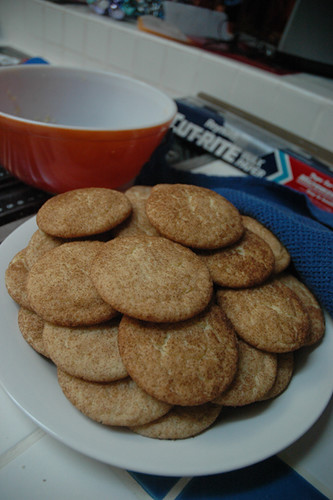
One thing we do agree on though; these are the best damn snickerdoodles in the world. I don't bother buying them anywhere... they are never as good. I've had friends make snickerdoodles for me that are just ok. I had a friend in high school that claimed hers were better... we actually planned a bake off and blind taste test. I don't remember executing it... I'm betting it never happened. Surely I would remember proving her wrong. (Or right, that might have required therapy.)


Cookie05

Snickerdoodles
from ???

1/2 cup butter (softened)
1/2 cup shortening
1 1/2 cups sugar
2 eggs
2 3/4 cups all purpose flour
2 teasp cream of tarter
1 teasp baking soda
1/4 teasp salt
2 tbsp sugar
2 teasp cinnamon

Preheat the oven to 400*F. Mix butter, shortening, 1 1/2 cups sugar, and the eggs. Blend in flour, cream of tarter, soda and salt. Shape the dough by rounded teaspoonfuls into balls. (Try to make them the size of small walnuts.) Mix the 2 tbsp sugar and cinnamon in a small bowl. Roll the balls in the sugar-cinnamon mixture and place them about 2 inches apart on un-greased cookie sheets. Bake 8-10 minutes or until set. (Cookies puff up first, then flatten out.) Immediately remove the cookies from the baking sheet.

Yields: 6 dozen cookies

TIPS: Watch the cookies closely. I often remove them before they flatten again... I like mine on the softer side. If you like them crisp, let them set. Remove to a cooling rack or they will dry out and overcook on the bottom.
Enjoy warm or store once cooled in airtight containers. I can't tell you how long they last, because I've never had them around for more than a day or two!!
These are a great gift around the holidays. The cinnamon screams holiday baking, and if you manage to make them as small as the recipe says (I never do) they are the perfect size for parties or large families.

Events and Distractions

Life has been quite busy around here! I had that long gap between posts because of a series of unfortunate immune system events (low grade cold + week of insomnia = real cold and real case of the crabbies). I spent the time torturing myself with thoughts of what I wanted to cook and bake and looking up recipes and photos online and in my bedside stack of cooking magazines. Anyone else do that? Just me?

Now that the cold has passed I have a series of exciting events. Most immediately has been the project of completely cleaning out my room. This is dual purpose; Brian, my boyfriend of almost three years, is moving into my apartment AND my dad is visiting from Germany. We're renting a moving van this weekend, my dad arrives early next week. Am I crazy? Maybe a little. Luckily Brian doesn't have a ton of stuff (do guys usually?) and most of it has been coming by car load over the last two weeks. We drove his dresser over on the top of his compact car this week... I wish I'd taken a picture of that!! So the clothes are getting unpacked into the dresser and closet as they arrive, and stuff for storage is going to the basement on an ongoing basis. Just have to get the rest of my clutter out of the way! I'm really excited to see the final transformation... and to finally be able to say my boyfriend lives with me! About time! :D

Also exciting; my roommate has adopted two kittens from a friend. They are adorable and completely distracting. I have the smaller one curled up next to me while I write this. The kittens adore my room because it doesn't smell like my roommates first cat. The result so far is that they seem to think I'm also "mom". Not that I'm complaining... I love the little things. Total sweethearts!

Meet Empress:
She's not the most photogenic cat I've ever met, but she was very nervous. It was her first day. I'm sure there will be better ones in the future.
Her undercoat is positively ORANGE in direct sunlight. Beautiful. She's about 2 years old, I believe.

Meet Auryn:
She's only about 6 months old, and still very kitten. Big ears, very playful. I've got ten minutes of video of her attacking my freshly washed duvet cover from once it was back on the bed last night.
100_0697
Of course like all kittens, she's asleep on it five minutes later. XD This was actually day 2, Sunday morning. She came in, spent 15 minutes exploring the room, and the did the sleepy Sunday morning kitten thing for me. <3

Yes, they are both named for the Neverending Story. XD


So! I've got back posts to catch up on. And a bunch of cooking coming up with my dad in town! I suspect he will want to eat in more than out. This is where you come in!! What are your favorite meals to cook for visiting family?

Monday, October 18, 2010

Vegetable Drawer Soup and Chicken Pot Pie

Since I roasted that chicken, I had a ton of leftovers to use up! Its actually one of my favorite things about that recipe. I even buy chickens a little bit big on purpose. :)

Some of my favorite meals use up chicken leftovers... or turkey. These are both great recipes for holiday leftovers too. ;)

The first one was one my mom made when I was little. It always seemed like a perfect meal in one dish to me. Plus, you can use your favorite vegetables or whatever you have on hand.

Chicken Pot Pie
idea from mom, execution modified by me

2 cups (approx) cooked chicken pieces
1 cup carrots, cut into pieces
1 cup brocolli
half a medium onion, chopped into small pieces
1 cup corn (if frozen: thaw in a bowl of warm water. fresh: cut off cob. canned: please don't!)
1/2 cup celery
1 can cream of chicken soup
water
1 tbsp olive oil (or pam)
2 Pie crust pieces (I like Pillsbury) near room temp

Spray frying pan with pam, or heat tbsp olive oil in frying pan. Cook up the onions until beginning to become clear. Add soup and 1 can of water to the pan, bring to a simmer. Add remaining veggies and chicken. Let it simmer for a few minutes to heat everything while you prep the crust.
If you forgot to leave the pie crust on the counter for a little to bring the temperature up, stick it in the microwave for about 5 seconds. You just want it closer to room temp so its easy to roll out. You can also stick it on top of the oven while it preheats.
Roll the first crust out onto the bottom of your glass pie pan. Press it down into the bottom edges.
Pour the chicken mixture into the crust lined pan.
Roll the second crust out over the mixture. Press the two crusts together so nothing oozes out. Put four or five slits in the crust for steam to get out.
Bake for 25 minutes in a 350*F oven.
Put a pie shield or strips of tin foil over the crust edges and bake for 10 more minutes. Pie is done when crust is golden brown.

Let it stand for 10 minutes, or as long as you can stand! I cut in right away and it was a little messy. Pieces will serve prettier if you can wait. :)
Messy enough I needed a spoon to serve it!


The second one was named by my mom. We've done this one pretty regularly since weight watchers while I was in high school. Difference was they called it "Zero Point soup" and it didn't have chicken (or noodles, I think). Its extremely versatile and adds great variety! Just use whatever you have on hand! No noodles? Use rice! All measurements in this are APPROXIMATE. I don't measure!! I just dump things in until I like the color balance. Add more liquid than you think you need! It cooks down a lot!

Vegetable Drawer Soup
from my mom, originally

2 cups cooked chicken, torn or cut into bite size pieces (OR 2 chicken sausages, cut into slices and then halves)
3-5 cups sliced veggies: carrots, celery, green beans, peas, corn, brussel sprouts, peppers, asparagus, mushrooms... ANYTHING you want!
3 cups chicken broth (bouillon cubes work nicely, just read the label for appropriate water amounts)
2 cups egg noodles (or rice or cous cous)
2-3 bay leaves
a few dashes each of oregano, basil, red pepper flakes, whatever your favorite spice is, that you are feeling at the moment (I don't often do red pepper flakes, for instance.)
extra water, as necessary

Put a LARGE pot on the stove. Add broth (or water with bouillon) and start to warm. Add the thickest crunchiest veggies first; carrots and brussel sprouts especially. Add chicken, spices, and remaining veggies (except any that might get mushy... like I tend to add mushrooms or spinach with the egg noodles or rice for the last 20 minutes). Stir, add water or more broth if it looks off balance. Bring to a boil, stir, reduce heat and let simmer. Cover or you'll lose even more moisture! Let it simmer for at least 20-30 minutes. Feel free to taste it as it goes, there is nothing raw in it (chicken sausage is pre-cooked). After first 30 minutes, when flavors are mingling to your satisfaction, add egg noodles or rice and any remaining soft veggies. Cover, cook for an additional 15-20 minutes or until noodles or rice are soft.

One of my favorite versions of this ever had italian chicken sausage, leftover cous cous/rice blend, spinach, and brussel sprouts. YUM.

Print

Related Posts with Thumbnails